
Straight to the Point…
Toiletries can be difficult to pare down and the 3-1-1 rule remains the number one reason that people choose to check their bags. This, of course, is expertly deduced from my very unscientific survey of friends, family members, and fellow travelers. Read on for tips.
Now, on to the info you need…
With a few tips and a little practice, you can learn to reduce the amount of liquids you carry. These tips are simple, practical, and tested by me on trips of varying lengths.
Before I piss someone off, because, well, I’m not everyone’s cup of tea, I’m not shaming people who want or need to check their bags. This article is truly about learning to reduce your liquids, if that’s what you choose to do. If you are interested, please read on. If you are not, please scroll on by.
First some background…What is the 3-1-1-Rule for Liquids?
The Transportation Security Administration (TSA) was created in response to the events of 9/11. In 2006, the TSA implemented its 3-1-1 rule for packing liquids in carry-on bags to prevent passengers from carrying enough materials on board an aircraft to assemble a bomb. This strict liquid rule applies to carry-on bags, and not checked bags. Most countries follow similar rules for air travel, so this 3-1-1 rule basically applies to all carry-on bags when traveling across the globe. I’ll cover the highlights here before we move on to how to achieve this Tetris of packing skills.
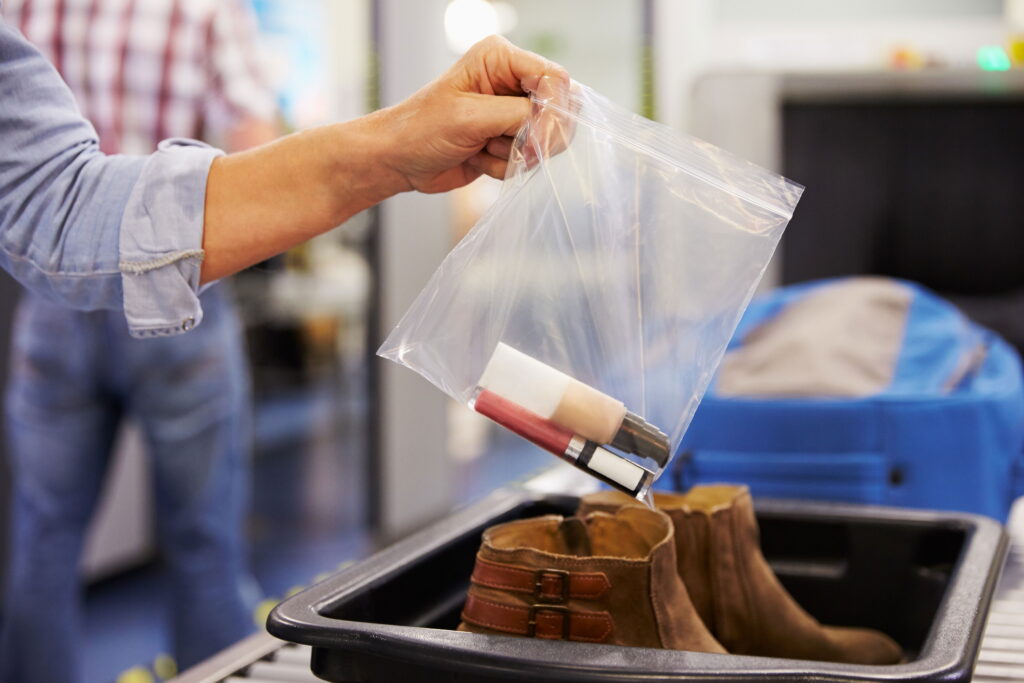
The 3-1-1 rule is simple. All individual liquids, aerosols, creams, gels, and pastes must be in a container no larger than 100 ml or 3.4 US ounces. The total of all these 100 ml containers must fit inside a one US quart (or one liter in the rest of the world) zip top bag that must zip completely closed. Only one zip top bag is allowed per passenger. So, 3 oz, in a 1 quart bag, and 1 bag per person, is the 3-1-1 rule for carry-on air travel.
This 3-1-1 rule also applies to food and drink items. Drinking water, sodas, applesauce, peanut butter in a container, yogurt, and other semi-solid foods count as liquids. If you pack pouches of peanut butter for snacks, these need to go in the 3-1-1 bag. (However, if you pack a PB&J sandwich, this is considered a solid according to the website, and does not need to go in the bag.) Confusing, right??? If you forget to remove your bottle of water or soda before the checkpoint, they will see it on the scanner, open your bag, and throw it away. They may also roll their eyes at you, don’t ask me how I know. Consider taking an empty water bottle and filling it up after the security checkpoint.
This 3-1-1 bag generally needs to be removed from your carry-on and placed in the bin for screening at the security check point. There are exceptions to having to remove the bag, such as being TSA Pre-Check or Global Entry approved. See my article on those programs here for more information. There are also exceptions to this rule for certain liquid medications and baby formula. In addition, individual TSA agents may vary in their enforcement of the 3-1-1 rule, which has created some confusion as to whether the rule still applies.
The 3-1-1 rule is absolutely still in place. Do not listen to your cousin’s best friend’s mother’s experience of how she got through security in Fargo without having all her liquids pared down and in the correctly sized zip lock bag. She was breaking the rules and she just got lucky. Please don’t chance it, or you may be forced to throw away your brand new container of expensive moisturizer at the security check point. The 3-1-1 rule is in the process of slowly changing. New scanning technology is being installed at airports around the globe and will eventually make the need for the 3-1-1 rule obsolete. A new scanner may come to your local airport, but until those changes are rolled out more fully, please follow the rules carefully. Again, this rule does not apply to checked bags. You may pack full size bottles of approved liquids (up to 18 oz, as above) in your checked bag.
Which Quart Bags are TSA Approved?
There is no such thing as a TSA approved 3-1-1 bag. You will see this advertised on Amazon and in stores on many of the bags they sell for this purpose. Some of the bags may even have the TSA logo or a cute little airplane imprinted on them. The TSA does not approve or endorse any specific bag. Their website simply states a one quart zip top bag that must zip completely closed. Claiming that a bag is TSA designed or approved is simply hype. If you prefer these types of bags, please use them, but I personally stick to plain old zip lock bags, and I reuse them until they are no longer useable. The zip lock bags with the gusset are still only a one quart volume, so you can’t get more than a quart in there, but some people swear by the gusset allowing them pack the containers more easily.
How Can You Reduce the Amount of Liquids You Need?
1. Scrutinize your daily routine. Start by seeing what you can live without. For example, if you use two cleansers, a moisturizer, and a special eye cream, can you get by with one cleanser and use your moisturizer for your eye area for the length of your trip? You don’t have to change your routine forever. Try it at home for the length of your planned trip and see how you do with a more simplified beauty routine.
2. Asses what liquids will be provided at your destination. If you’re staying in a hotel or going on a cruise, can you use the hotel and cruise ship shampoo and conditioner? Might these products be suitable for the duration of your trip? I don’t have picky hair and always use the ship and hotel shampoo. I do like my It’s a 10 Leave In Conditioner, so I pack that in a 10 ml lip gloss tube. I only use a tiny amount. Not bringing shampoo and conditioner is a huge space saver for me. If you are staying at an Air B&B or VRBO, double check with the host about which products will be available.
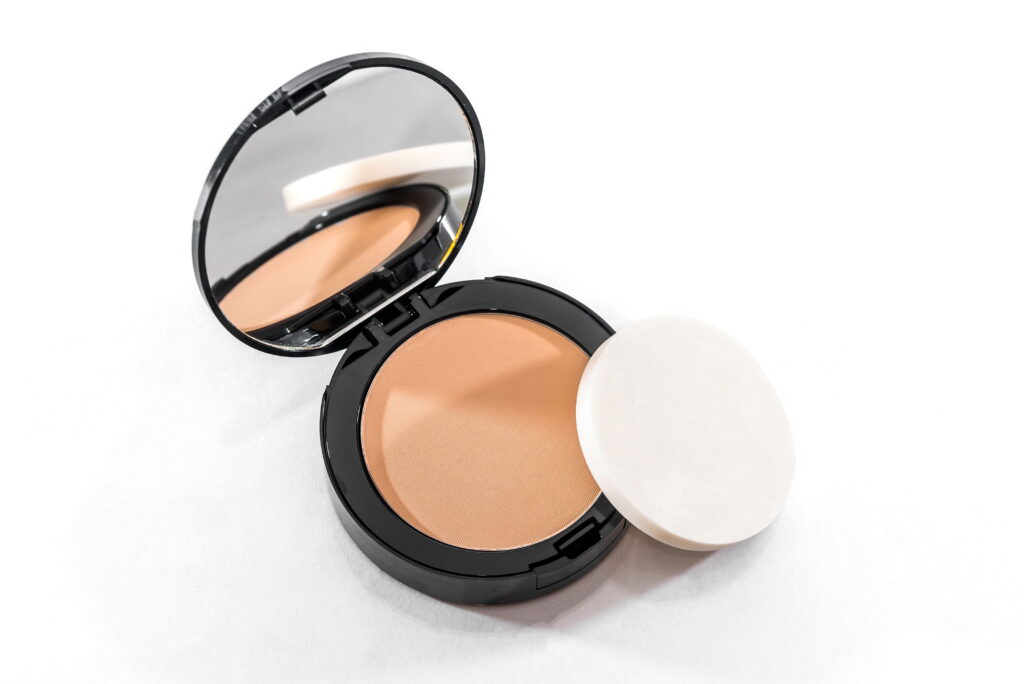
3. Swap your liquids for solids. Lots of products such as shampoo, conditioner, and moisturizers now come in a solid form. They are widely available in cosmetic stores and on Amazon. I have tried the Ethique brand of shampoo bar. It works great, it’s tiny, and packs into a tiny zip lock bag that is made for pills. Toothpaste comes in tablet form. Some people make their own toothpaste tablets by putting a dot of toothpaste on wax paper and letting it dry out, then packing it into a small zip lock bag for storage. It seems extreme, but every liquid you can swap out will help, especially if your airline enforces a weight limit on the carry-on or personal item. Bar soap can be used instead of shaving cream. I never take a trip without a bar of Dove soap in a zip lock bag.
4. Swap your liquids for wipes. Makeup remover, cleanser wipes, and nail polish remover wipes are all very popular for traveling. I use Almay brand oily makeup remover pads to remove my waterproof mascara and I love them.
5. Squirt your liquid cleanser, moisturizer, or toner onto a facial sponge or cotton round and let it partially dry. Pack into a zip lock bag for storage. When ready to use, dampen the sponge and your product is ready to go. Try this at home to see how it works. Even if you pack them up while still damp, they will not be considered a liquid as long as they are not dripping wet. This trick also works for laundry detergent or Dawn soap for stain removal. You can cut up a sponge for these items.


6. Use samples from your favorite cosmetic store. Watch for sales at your beauty counter where you can often find free gifts of a smaller size product with purchase.
7. Purchase travel sizes of your favorite brands. These are widely available. This is a less sustainable option, because not all travel size containers can be refilled. Still, this can work in a pinch. I prefer to decant my needed liquids into the reusable containers I have collected over the years, as they are refillable and better for the environment.
8. Purchase products at your destination. People all over the world use the same kinds of products we here in the US use, just in different brands. Some women actually prefer buying makeup and cosmetics in Europe because they like the quality better. Many products that we can buy over the counter at Target or Walgreen’s in the US are actually sold at a chemist or pharmacy in Europe. I have found the pharmacists are more than happy to answer any questions, help me translate labels, and make recommendations when I have needed cold medicine and other things. They are happy to have the sale, so don’t disappoint them!
We both got really sick in Germany one time and had to buy a bottle of Nyquil at a pharmacy. It was the green kind and not very tasty, but the pharmacist was helpful and even threw in a package of tissues. We slept like babies so we could finally enjoy all those beautiful Christmas markets in Cologne.

How to Pack Your Liquids for Carry-On Travel
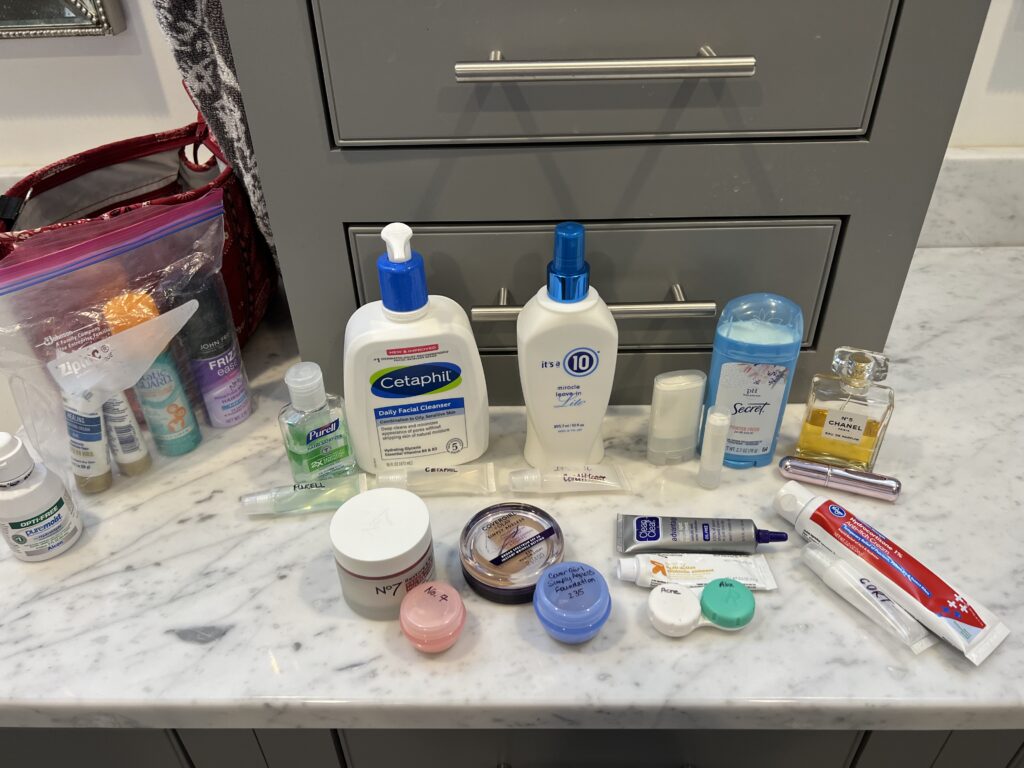
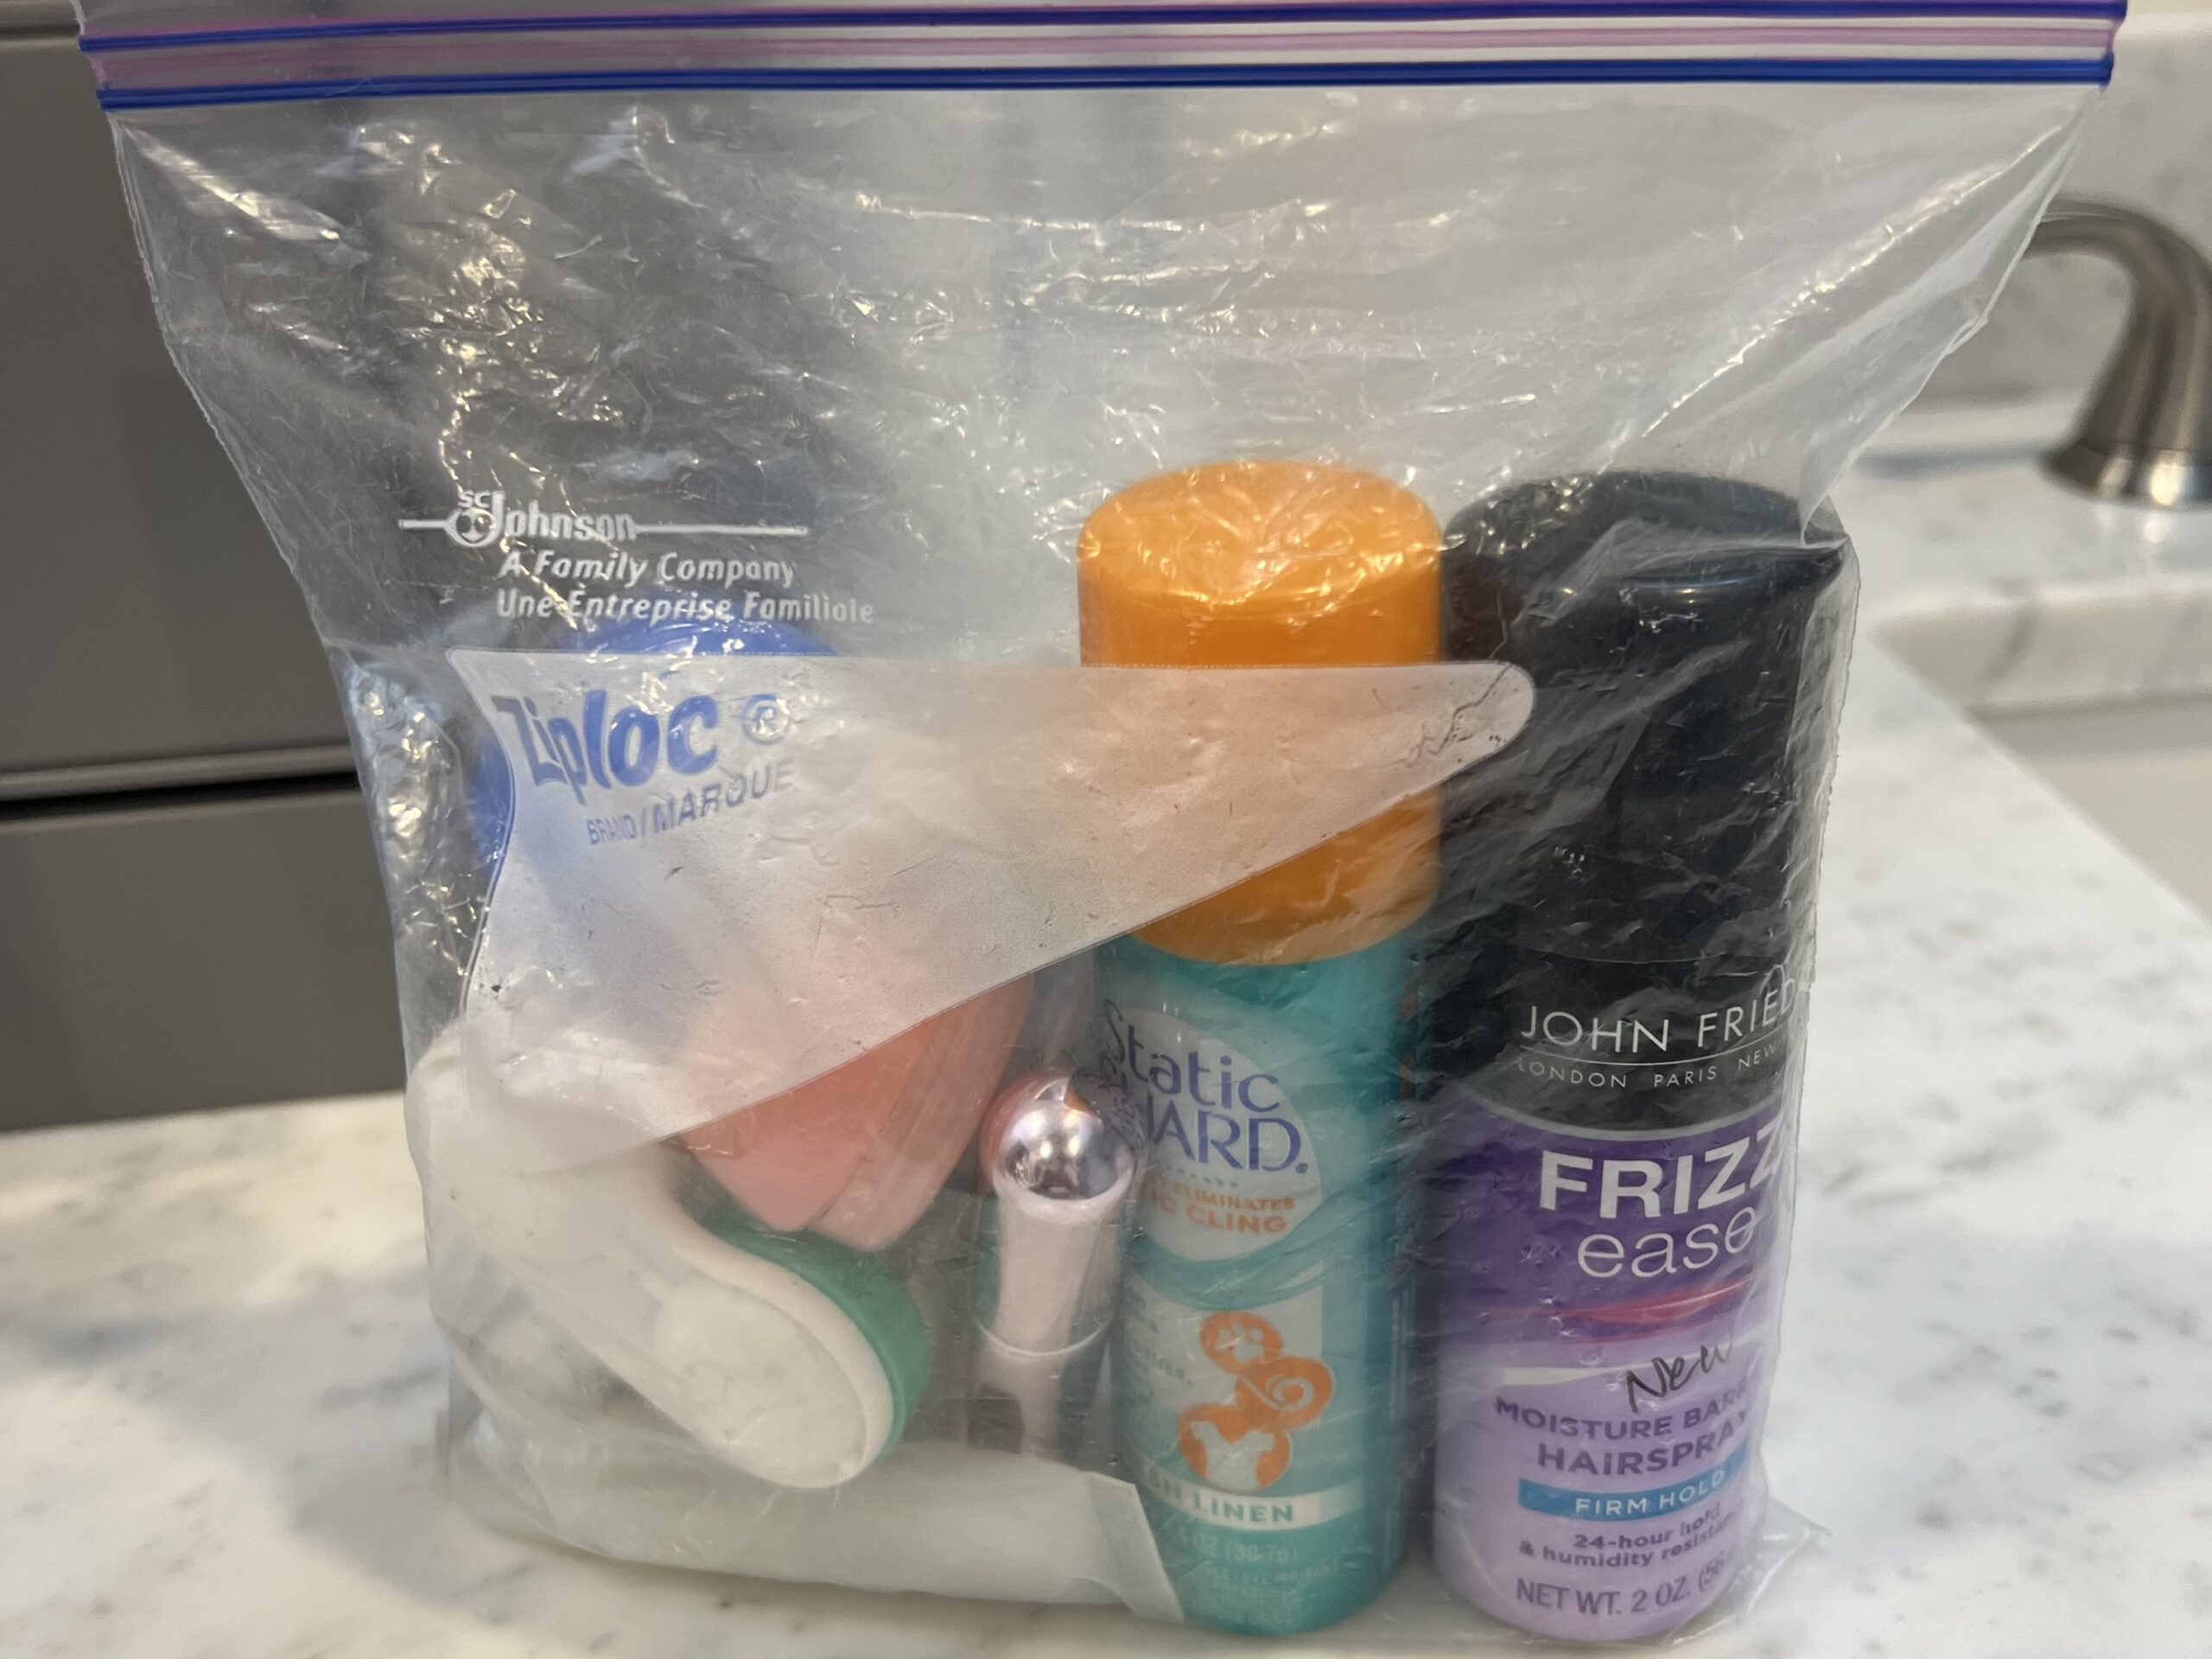
1. Decant your liquids. Now that you have scrutinized your routine, assessed your options, and decided exactly what you still need to pack, you will likely need to decant your must have liquids into smaller containers. Your liquids might include liquid make-up, concealer, facial serums, moisturizers, toners, cleansers, shampoo, conditioner, cortisone cream, toothpaste, etc. Any liquid product you take in your carry-on bag will need to be decanted into a smaller container to fit into the 3-1-1 quart bag. Remember, you only get one quart bag per person and it must zip all the way closed to be in compliance.
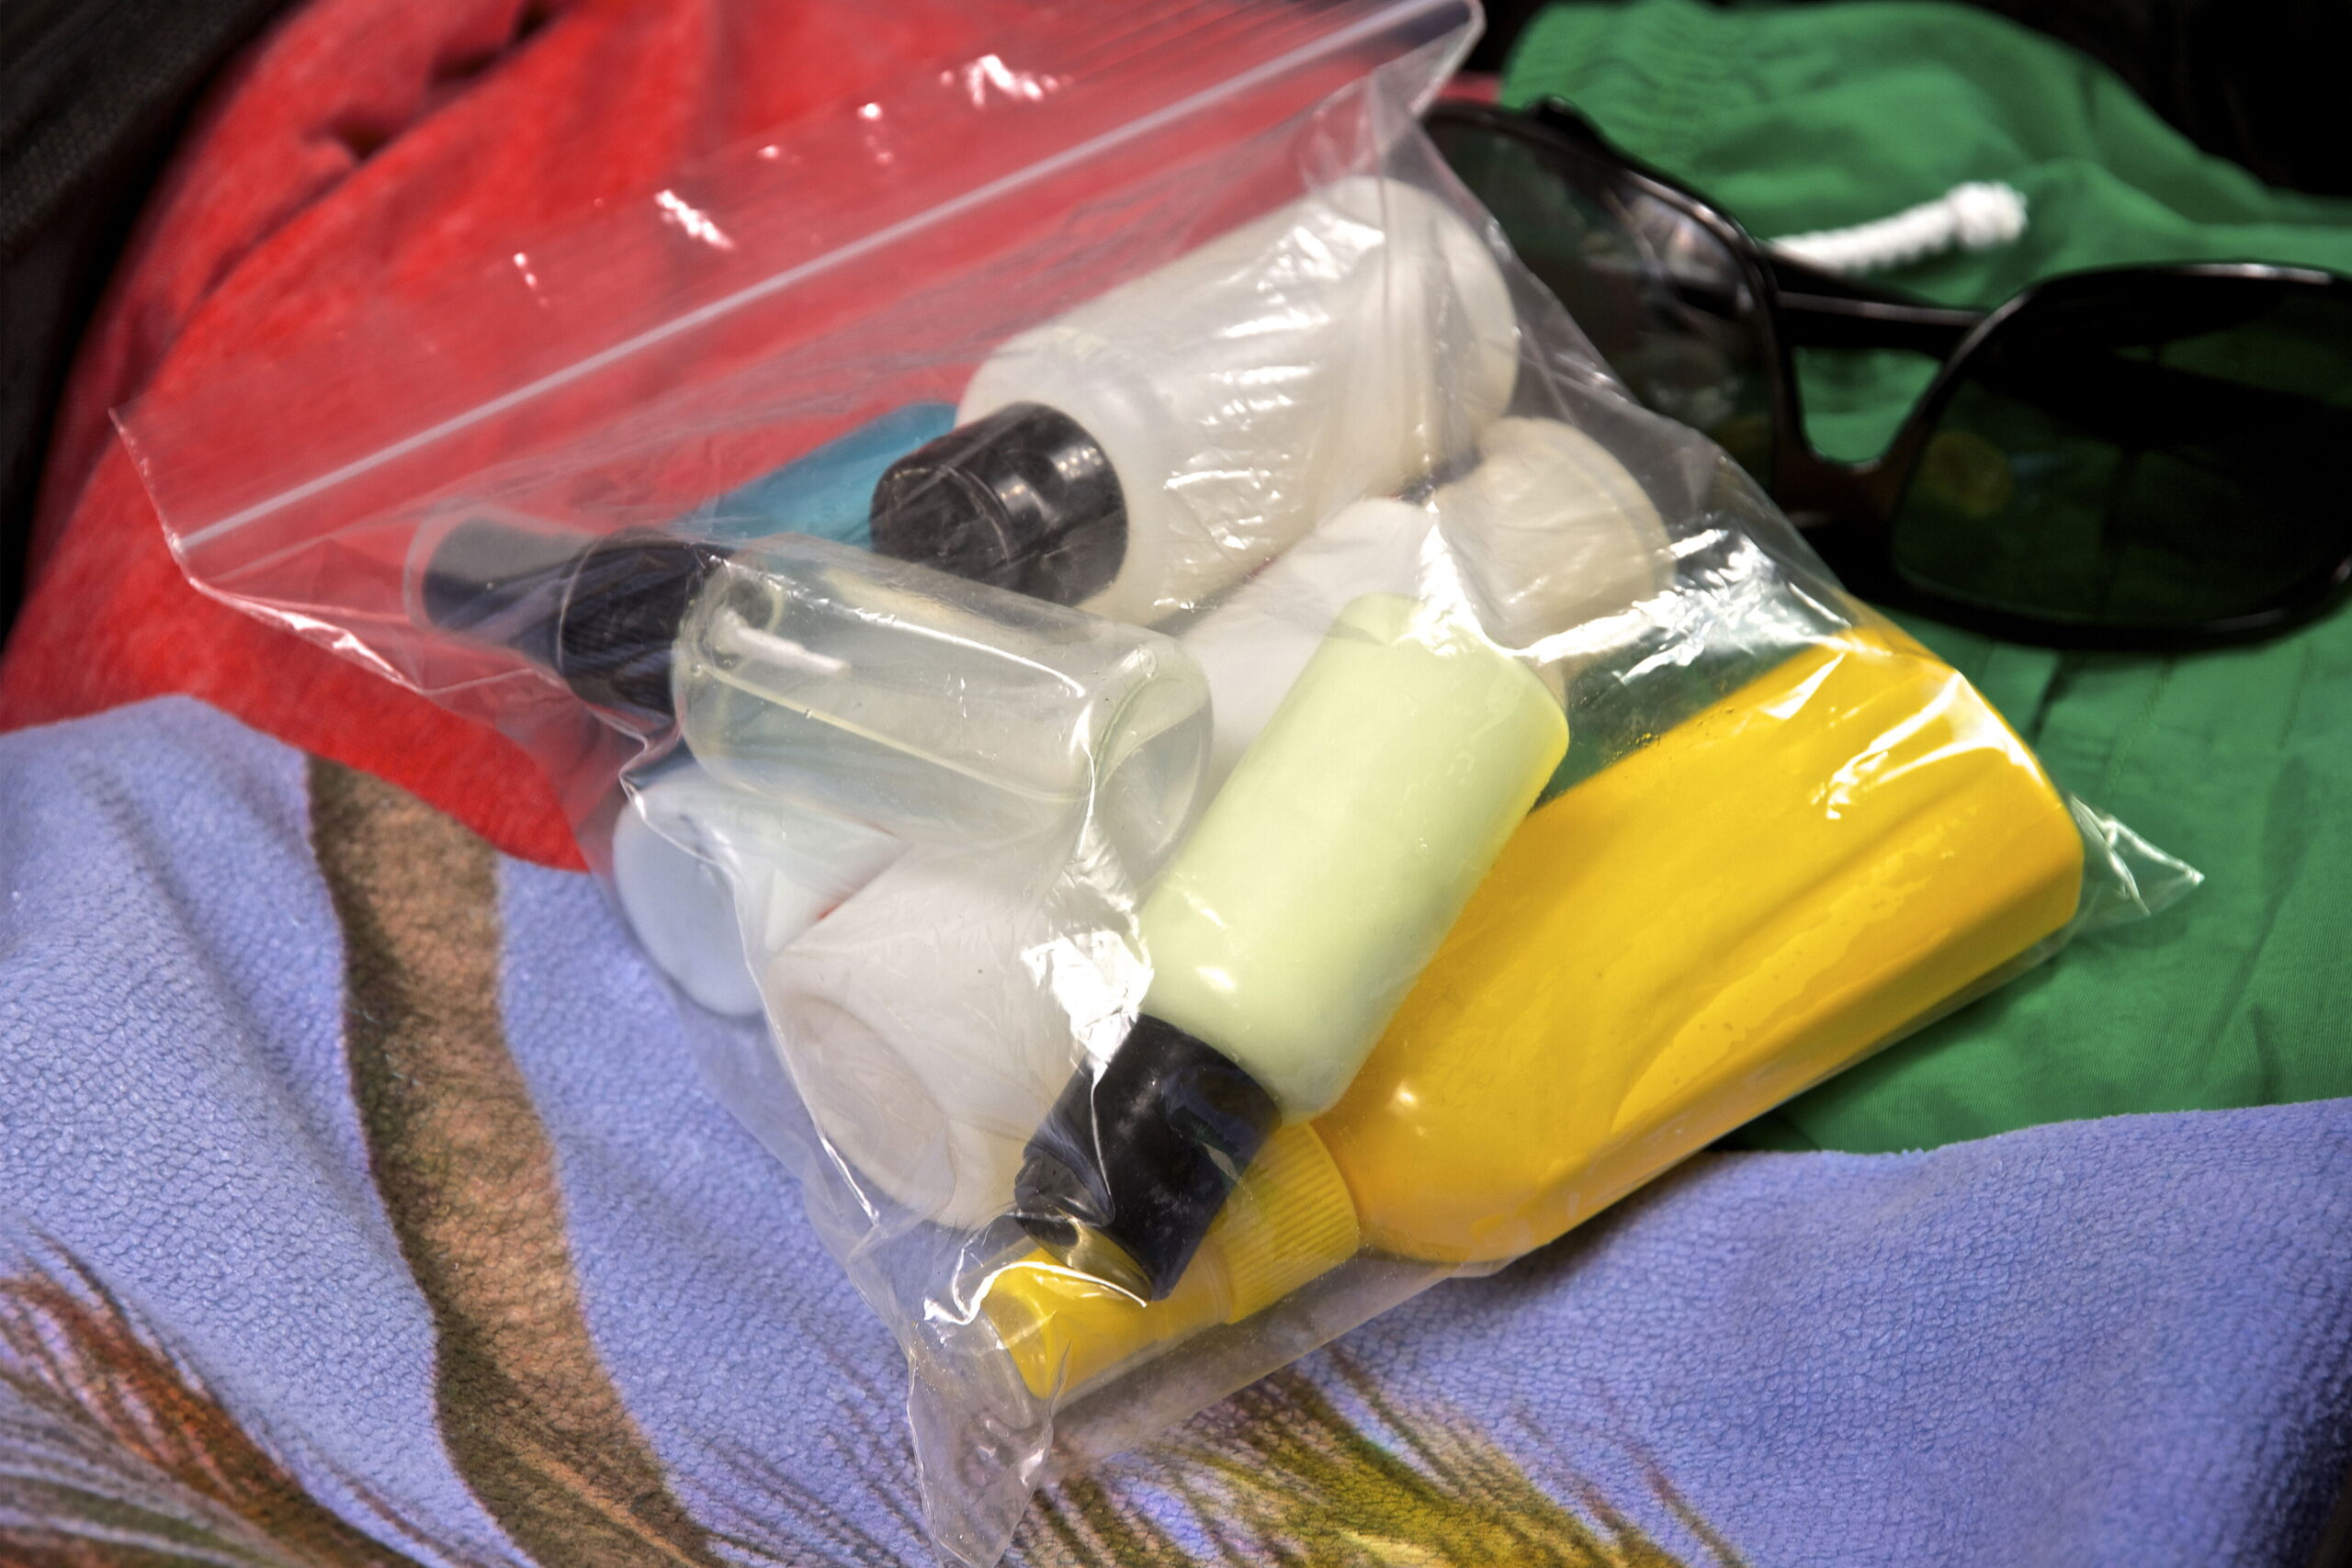
2. Try different containers. There are a variety of small containers available in the travel section at Target and on Amazon. I’m a fan of the 10 ml lip gloss tubes and the 20 ml pots from Amazon. These also come in larger sizes and a quick search will yield too many to count. The lip gloss tubes come with simple instructions on how to fill them by removing the tip. I also like to use contact lens cases for my creams such as triple antibiotic ointment, acne cream, cortisone cream, and liquid concealer. They hold more than enough of these products since I use so little. Packs of contact lens cases are widely available. You can also purchase a variety of 2 oz and 3 oz squeezable containers and rollable pouches made especially for travel with non-leaking lids. They are refillable and get smaller as you use the product. Try these out and see what you think. Photos are from a recent trip. Look at the difference smaller containers make!
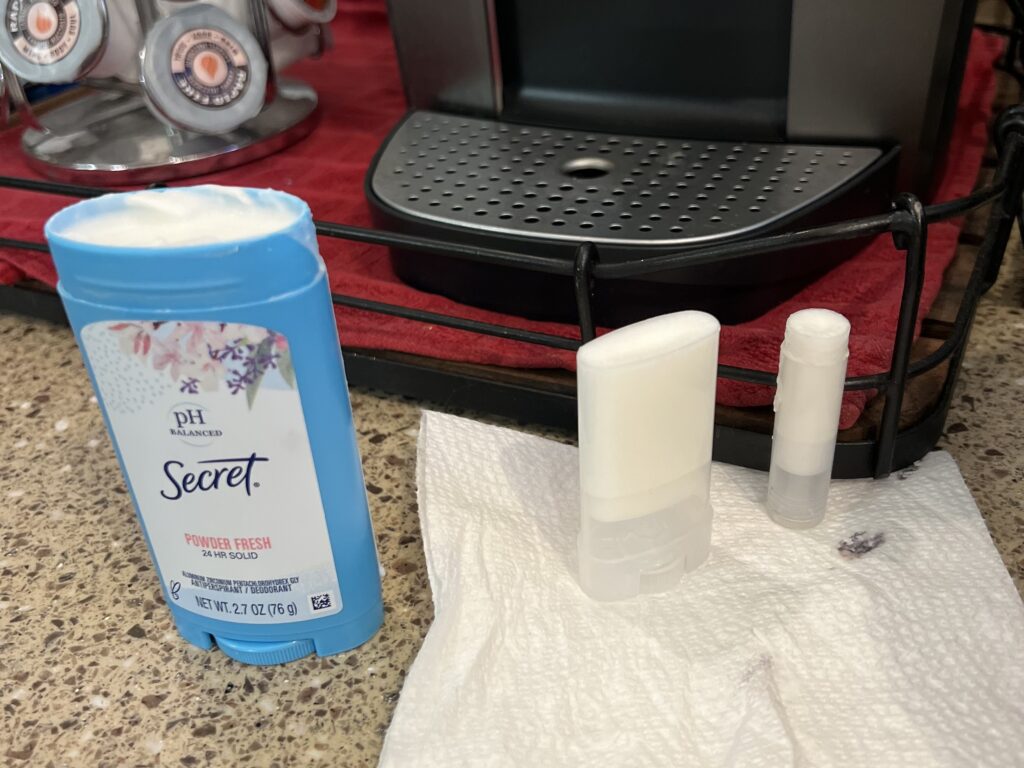
3. Test your amounts at home. We really don’t need as much product as we tend to think. The best way to assess your liquid needs is to decant the products into smaller containers a few weeks before your trip, and use out of those containers at home to see how long they last. You might be surprised to find you need an even smaller container. This may seem like overkill, but you can actually put deodorant into a smaller container by slicing off a small chunk, melting it in the microwave on low power, pouring it into an empty lip balm container, and letting it set until it becomes solid again. I also purchased some small, refillable deodorant containers from Amazon for this purpose. They work really well and will last for a couple months. Stick or solid deodorant is TSA legal for a carry-on bag, but that plastic container takes up a lot of space, and is heavier than it needs to be if your airline has a weight limit for your bags.
4. If you have a travel partner, share your partner’s quart bag. My husband needs fewer liquid products than I do, so I slip a couple things in his quart bag when I can. This can also work if you are traveling with children. The rule is one quart bag per person, so load those kids’ bags up with your facial cleanser and shampoo if needed.
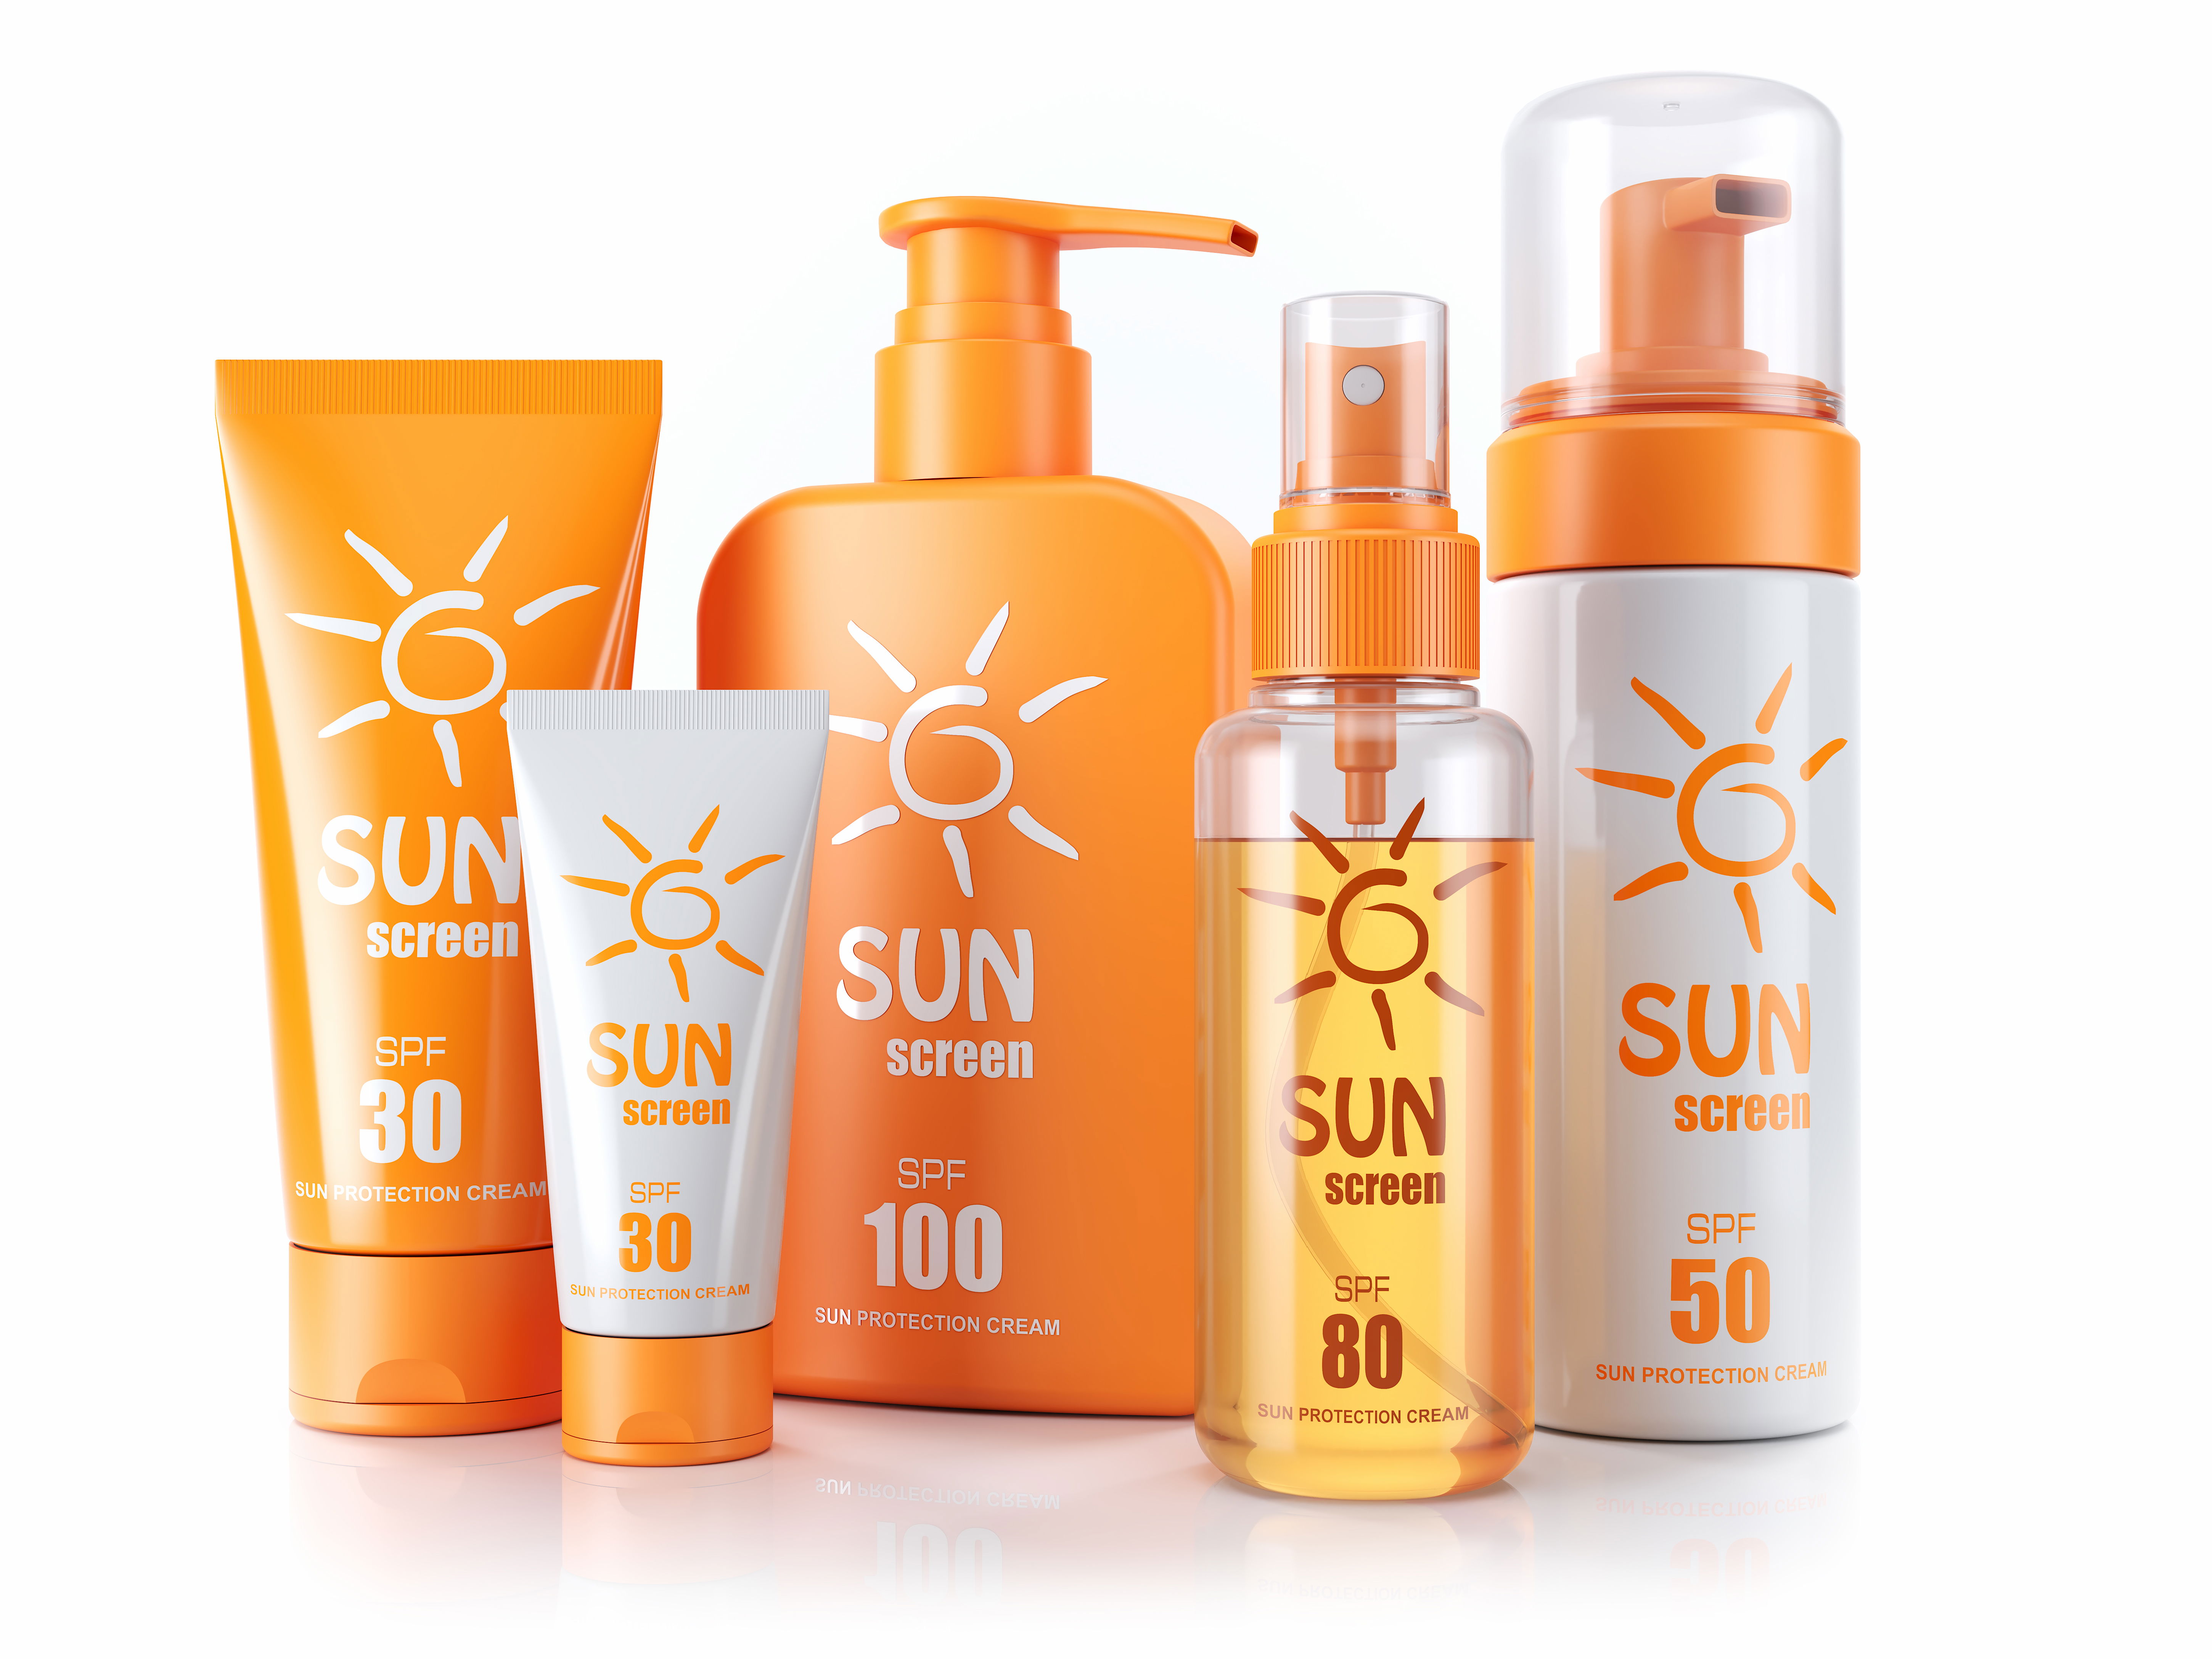
5. Be careful with sunscreen. Sunscreen presents a unique problem with decanting. Sunscreen is packaged in containers that are designed to protect it from light and air, both of which can degrade the product over time. In addition, decanting sunscreen into containers not specifically made for sunscreen can cause a reaction with the container itself and can potentially degrade or contaminate the product. Silicone containers are especially notorious for this. Check with your dermatologist or beauty counter for more information. For these reasons, I do not recommend decanting sunscreen. Instead, I buy it in a container smaller than 100 ml and pack it if I absolutely must. That prepackaged container can take up a lot of room in my quart bag, so my routine is to purchase it at my destination.
What About Semi-Solid Items?
It can be confusing when an item is a semi-solid or creamy substance, such as the cream foundation I use. Items like mascara, lip stick, chap stick, and other semi-solid or semi-liquid items can also cause confusion. TSA says “Remember, if you can spill it, spray it, spread it, pump it, or pour it, then it is a liquid.”
The TSA’s What Can I Bring page actually indicates that mascara is considered a liquid and is subjected to the 3-1-1 rule. This is because it is spreadable, I presume. I had a mascara confiscated and learned the hard way, so I put it in my 3-1-1 bag now.The What Can I Bring page also indicates that lip stick and chap stick are not required to go in the 3-1-1 bag, even though, in my opinion, they are spreadable. Be sure to put liquid lip products like gloss or stain in your 3-1-1 bag.
TSA does not specifically address semi-solid cream foundation, but it does require “foundation” and “liquid concealer” (quotes indicate wording on website) to be in the 3-1-1 bag. My cream foundation is indeed spreadable, and arguably, not more so than a chap stick, but I decant it by scooping it out and putting it in a 20 ml hard plastic pot, and put it in my 3-1-1 bag. The bottom line is that the final decision always rests with the TSA officer on whether an item is allowed through the checkpoint. For this reason, I always err on the side of caution, but I’m a crazy rule follower!
How Do I Pack My Own Liquids?
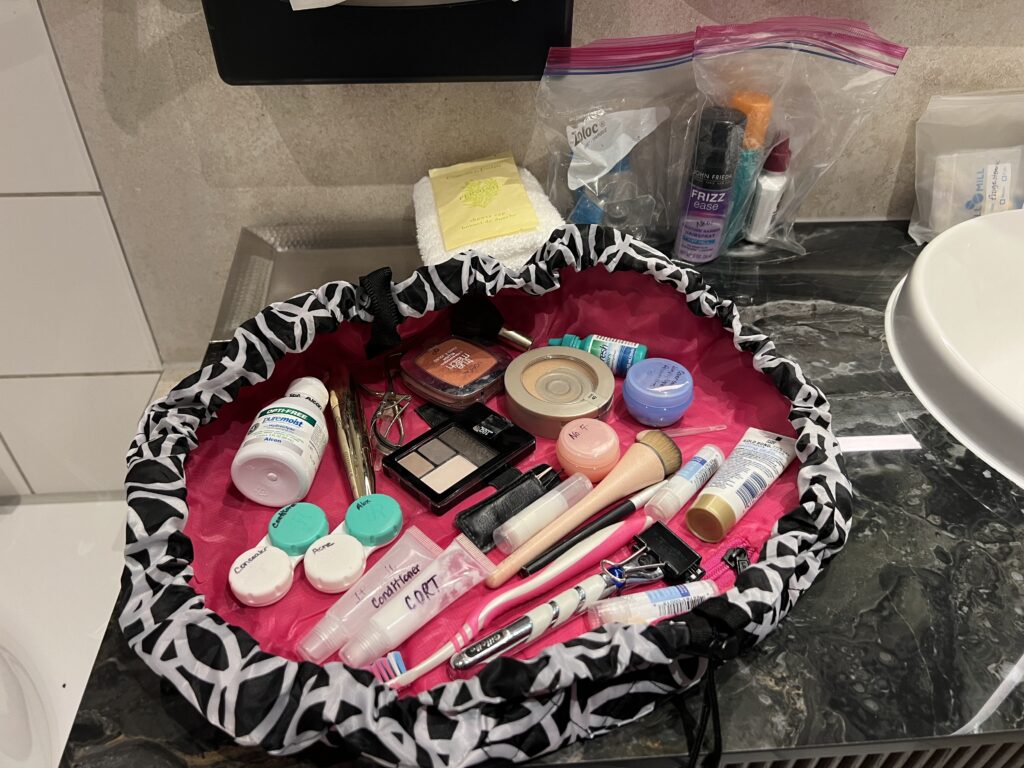
I use a variety of small reusable containers, contact lens cases, 20 ml plastic pots, and lip gloss tubes for my liquids. I pack these in a regular quart sized zip lock bag, and I generally use an old Vera Bradley zip top cosmetic bag, or a Lay n Go bag, for my other non-liquid toiletries. Try experimenting with different bags and pouches until you find a system that works for you. Hanging toiletry bags are popular for their organization, and I have used them with success in the past, but find I prefer the larger single opening of the Vera bag or the Lay n Go bag for most trips. The Lay n Go bag, pictured here, is very handy at your destination as it opens wide and has a lip to contain things on the counter, then zips up with a draw string when not being used.
The most important thing to remember about packing your liquids is that the 3-1-1 bag needs to be readily accessible at the security check point so you can get through without holding up the passengers behind you. I keep my zip lock bag right on the top inside my backpack so I can get to it quickly and easily. Even though I am Global Entry and TSA Pre-Check approved, the TSA officer could still ask me to take my 3-1-1 bag out for screening, so I am always prepared. As I mentioned, they always have the final say, no matter your pre-approval designation. Since the 3-1-1 rule has been in force since 2006, so there really is no excuse for not being prepared.
Summary
Packing liquids for carry-on travel doesn’t have to be difficult. With these tips, you can learn to reduce the amount of liquids you need, and pack them in the right containers to be in compliance with the TSA 3-1-1 rule. It has taken me several trips to learn all of this, and I am still learning. I get better with each trip, and you will too!